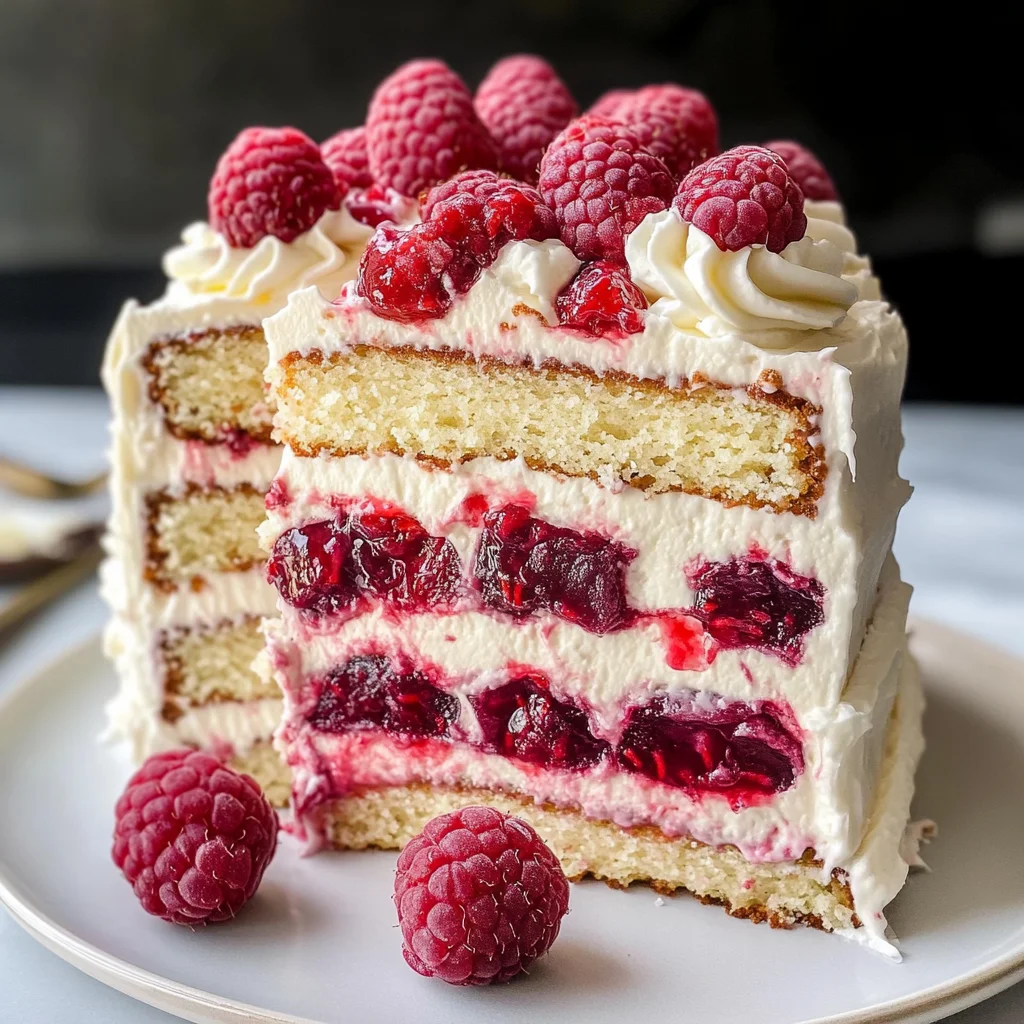
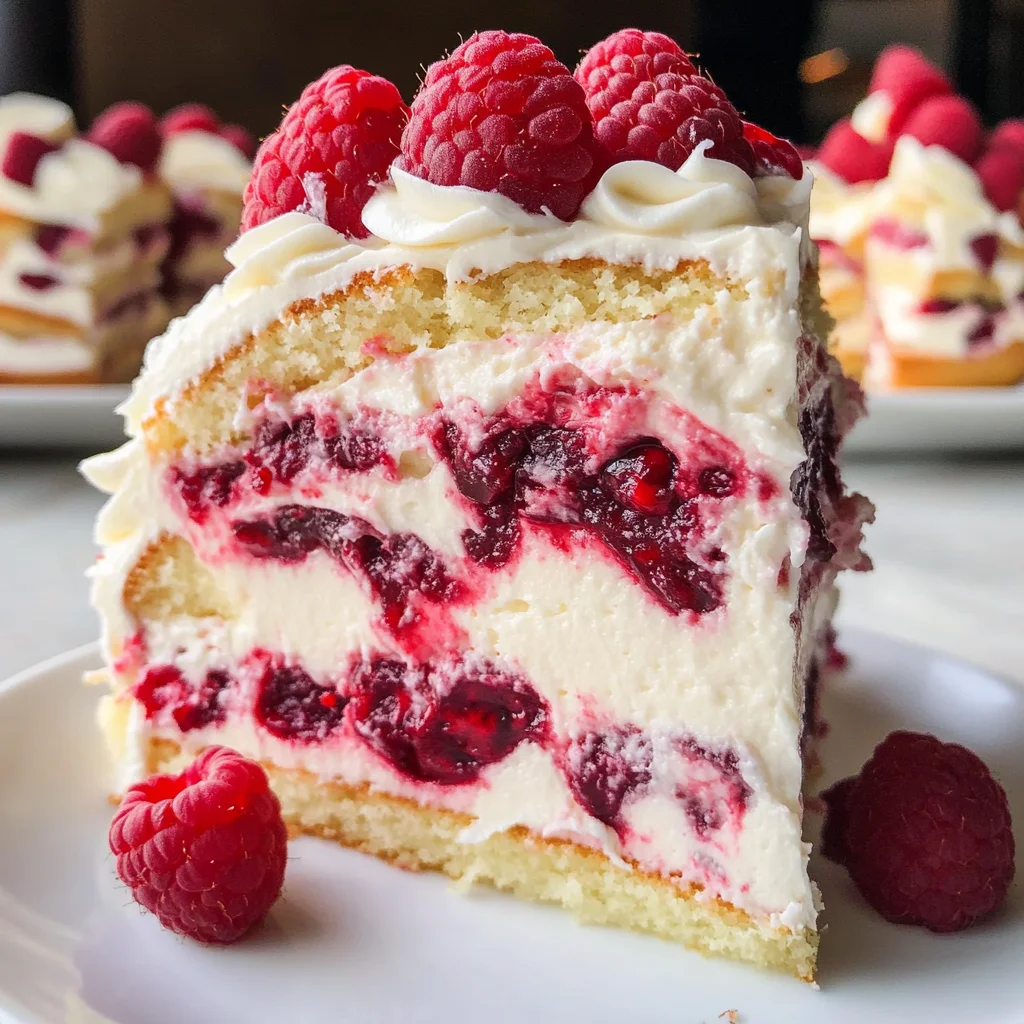
White Chocolate Raspberry Dream Cake
If you’re looking for a show-stopping dessert that will impress your friends and family, let me introduce you to my beloved White Chocolate Raspberry Dream Cake. This cake is not just a treat; it’s an experience! With its rich layers of moist cake, creamy white chocolate, and the zing of fresh raspberries, it seamlessly combines flavors that dance on your palate. Whether it’s for a special celebration or just a cozy weekend at home, this cake adds a touch of magic to any occasion.
What makes this recipe truly special is the balance of sweetness from the white chocolate and the tartness of raspberries. It’s like a hug in dessert form! Plus, it’s surprisingly easy to whip up, making it perfect for busy weeknights or family gatherings. Trust me, once you try it, it may just become your go-to dessert!
Why You’ll Love This Recipe
- Easy to Make: The steps are straightforward, so even if you’re new to baking, you can totally nail this!
- Family Favorite: Kids and adults alike will love the delightful combination of flavors.
- Perfect for Any Occasion: Whether it’s a birthday party or an afternoon tea, this cake suits every event beautifully.
- Make Ahead Friendly: You can prepare this cake in advance and chill it until you’re ready to serve.
- Visually Stunning: The presentation is as delicious as the taste! Fresh raspberries on top make it look fancy.
Ingredients You’ll Need
You’ll find that these ingredients are simple and wholesome. They come together to create something truly magical!
For the Cake
- 2 1/2 cups all-purpose flour
- 2 teaspoons baking powder
- 1/2 teaspoon baking soda
- 1/2 teaspoon salt
- 1 cup unsalted butter
- 1 1/2 cups granulated sugar
- 4 large eggs
- 1 teaspoon vanilla extract
- 1 cup whole milk
- 1/2 cup sour cream
- 6 ounces white chocolate, melted
For the Filling and Topping
- 1 1/2 cups fresh raspberries
- 1/2 cup raspberry jam
- 2 cups heavy whipping cream
- 2 tablespoons powdered sugar
- 1 teaspoon vanilla extract
Variations
This recipe is quite flexible, allowing you to get creative in the kitchen! Here are some fun variations you can try:
- Change the Berries: Swap out raspberries for blueberries or strawberries for a different flavor profile.
- Add Zest: A little lemon or lime zest in the batter can add a refreshing twist.
- Use Different Chocolates: Dark chocolate instead of white chocolate gives a richer taste and pairs well with berries.
- Layer with Other Flavors: Try adding layers of lemon curd or almond cream for extra depth.
How to Make White Chocolate Raspberry Dream Cake
Step 1: Preheat Your Oven
Start by preheating your oven to 350°F (175°C). This ensures that your cakes bake evenly right from the start.
Step 2: Prepare Your Pans
Grease and flour two 9-inch round cake pans. This step helps prevent sticking and ensures your cakes come out beautifully.
Step 3: Mix Dry Ingredients
In a medium bowl, whisk together all-purpose flour, baking powder, baking soda, and salt. This mixes them evenly so your cake rises perfectly.
Step 4: Cream Together Butter and Sugar
In a large mixing bowl, beat unsalted butter and granulated sugar until light and fluffy—about 3-4 minutes. This step creates air pockets that make your cake tender.
Step 5: Add Eggs One at a Time
Add the eggs one at a time while beating well after each addition. This helps incorporate them smoothly into the batter.
Step 6: Incorporate Vanilla
Mix in vanilla extract until fully combined. The vanilla adds warmth and richness to your cake’s flavor.
Step 7: Combine Milk and Sour Cream
In another bowl, stir together whole milk and sour cream until smooth. This mixture adds moisture to your cake.
Step 8: Mix Dry Ingredients with Wet
Gradually add dry ingredients into the butter mixture while alternating with milk and sour cream. Start and end with dry ingredients—this keeps everything balanced!
Step 9: Fold in White Chocolate
Gently fold in melted white chocolate using a spatula until fully incorporated. This adds that luxurious creamy texture we all love.
Step 10: Bake Your Cakes
Divide batter between prepared pans. Smooth tops with a spatula before baking for about 25-30 minutes until a toothpick comes out clean.
Step 11: Cool Cakes
Let cakes cool in pans for about 10 minutes before transferring them to wire racks to cool completely. Proper cooling is key for easy assembly later!
Step 12: Prepare Raspberry Filling
While cooling, mash fresh raspberries in a bowl until broken down into small pieces. Then mix in raspberry jam until well combined. This filling is what makes each slice burst with flavor!
Step 13: Make Whipped Cream
In another large bowl, beat heavy whipping cream with powdered sugar and vanilla on high speed until stiff peaks form. The whipped cream will be both frosting and filling!
Step 14: Assemble Your Cake
Once cooled, place one cake layer on a serving platter. Spread raspberry filling over it followed by whipped cream—this layering creates that dreamy texture!
Step 15: Top It Off
Place the second layer on top gently pressing down. Spread remaining whipped cream over top and sides of your beautiful creation.
Step 16: Garnish & Chill
Finish off by garnishing with fresh raspberries arranged artfully on top! Chill in the refrigerator for at least one hour before serving—this allows flavors to meld perfectly.
Now take a moment to relish your hard work! Slice into that stunning White Chocolate Raspberry Dream Cake and enjoy every bite—you deserve it!
Pro Tips for Making White Chocolate Raspberry Dream Cake
Creating a stunning White Chocolate Raspberry Dream Cake is easier than you think! Here are some tips to help you achieve that perfect result.
-
Use room temperature ingredients: Bringing your eggs, milk, and butter to room temperature allows for better emulsification, resulting in a lighter, fluffier cake.
-
Don’t overmix the batter: Mixing the batter just until combined prevents the development of gluten, which can lead to a dense cake. Keep it light and airy!
-
Cool cakes completely before frosting: Allowing your cakes to cool fully ensures that the whipped cream doesn’t melt and slide off, giving you a beautifully layered dessert.
-
Store leftovers properly: If you have any cake left, store it in an airtight container in the refrigerator. This keeps it fresh and delicious for several days!
-
Experiment with different berries: While raspberries are delightful, don’t hesitate to try blackberries or strawberries for a fun twist on flavor!
How to Serve White Chocolate Raspberry Dream Cake
Serving this delightful cake can be as creative as your heart desires! Here are some fun ideas to elevate your dessert presentation.
Garnishes
- Fresh mint leaves: A few sprigs of mint not only add a pop of color but also provide a refreshing flavor contrast.
- White chocolate shavings: Sprinkle some finely shaved white chocolate on top for an elegant touch that complements the flavors beautifully.
- Powdered sugar dusting: A light dusting of powdered sugar can give your cake a charming finish and enhance its visual appeal.
Side Dishes
- Vanilla ice cream: The creamy richness of vanilla ice cream pairs perfectly with the tartness of the raspberries and the sweetness of the white chocolate.
- Lemon sorbet: A scoop of lemon sorbet offers a refreshing palate cleanser that balances the richness of the cake.
- Fresh fruit salad: A mixture of seasonal fruits adds freshness and brightness to your dessert table, making for a delightful contrast in textures and flavors.
- Coffee or herbal tea: Serving this cake alongside a warm cup of coffee or soothing herbal tea enhances its indulgent nature while offering a comforting experience.
Now you’re all set to impress family and friends with your stunning White Chocolate Raspberry Dream Cake! Enjoy every sweet moment.
Make Ahead and Storage
This White Chocolate Raspberry Dream Cake is perfect for meal prep! You can make it ahead of time and store it properly to enjoy later or share with friends and family.
Storing Leftovers
- Allow the cake to cool completely before storing.
- Store any leftovers in an airtight container in the refrigerator for up to 3 days.
- For best taste, consume within 1-2 days as the layers may become soggy over time.
Freezing
- Wrap individual slices or the whole cake tightly in plastic wrap, then place it in a freezer-safe container.
- Freeze for up to 3 months for optimal flavor.
- To thaw, transfer the cake to the refrigerator overnight before serving.
Reheating
- For best results, allow the cake to come to room temperature before serving after freezing.
- If desired, you can warm individual slices in the microwave for about 10-15 seconds on low power.
FAQs
Here are some common questions about making your own White Chocolate Raspberry Dream Cake.
Can I substitute other fruits in the White Chocolate Raspberry Dream Cake?
Absolutely! Feel free to experiment with other berries like strawberries or blueberries. Just keep in mind that different fruits will slightly alter the flavor profile.
How can I enhance the flavor of my White Chocolate Raspberry Dream Cake?
Consider adding a splash of lemon juice or zest to your raspberry filling. This will add a lovely brightness that complements the sweetness of the white chocolate beautifully!
Is there a way to make this White Chocolate Raspberry Dream Cake gluten-free?
Yes! You can use a gluten-free all-purpose flour blend as a substitute for regular flour. Make sure it has xanthan gum included or add some if necessary for better texture.
Can I use frozen raspberries for this recipe?
Yes, frozen raspberries work well! Just be sure to thaw and drain them before using to avoid excess moisture in your filling.
Final Thoughts
I hope you find joy in creating this delicious White Chocolate Raspberry Dream Cake! It’s not just a dessert; it’s a celebration of flavors that will surely impress everyone at your table. Whether it’s for a special occasion or a sweet treat just because, this cake is sure to bring smiles. Enjoy every moment of baking and savor each delightful bite—happy baking!
White Chocolate Raspberry Dream Cake

Indulge in the exquisite delight of our White Chocolate Raspberry Dream Cake! This show-stopping dessert features layers of moist cake enriched with creamy white chocolate and vibrant fresh raspberries, creating a perfect balance of sweetness and tartness that will leave your taste buds dancing. Ideal for birthdays, celebrations, or a cozy weekend treat, this stunning cake is surprisingly easy to make. With its visually appealing presentation topped with fresh raspberries, it’s sure to impress friends and family alike. Whether you’re a novice baker or an experienced chef, this recipe brings joy and flavor to any occasion!
- Prep Time: 30 minutes
- Cook Time: 30 minutes
- Total Time: 1 hour
- Yield: Serves approximately 12 slices 1x
- Category: Dessert
- Method: Baking
- Cuisine: American
Ingredients
- 2 1/2 cups all-purpose flour
- 2 teaspoons baking powder
- 1/2 teaspoon baking soda
- 1/2 teaspoon salt
- 1 cup unsalted butter
- 1 1/2 cups granulated sugar
- 4 large eggs
- 1 teaspoon vanilla extract
- 1 cup whole milk
- 1/2 cup sour cream
- 6 ounces white chocolate, melted
- 1 1/2 cups fresh raspberries
- 1/2 cup raspberry jam
- 2 cups heavy whipping cream
- 2 tablespoons powdered sugar
Instructions
- Preheat your oven to 350°F (175°C) and grease two 9-inch round cake pans.
- In a bowl, whisk together flour, baking powder, baking soda, and salt.
- Cream butter and sugar until light and fluffy; add eggs one at a time.
- Mix in vanilla extract.
- Combine milk and sour cream; alternate adding this mixture with the dry ingredients into the creamed butter.
- Gently fold in melted white chocolate.
- Divide batter between prepared pans and bake for 25-30 minutes until a toothpick comes out clean.
- Cool cakes completely before assembling with raspberry filling and whipped cream.
Nutrition
- Serving Size: 1 slice
- Calories: 450
- Sugar: 35g
- Sodium: 180mg
- Fat: 30g
- Saturated Fat: 18g
- Unsaturated Fat: 10g
- Trans Fat: 0g
- Carbohydrates: 40g
- Fiber: 1g
- Protein: 5g
- Cholesterol: 90mg