Monster Cookies
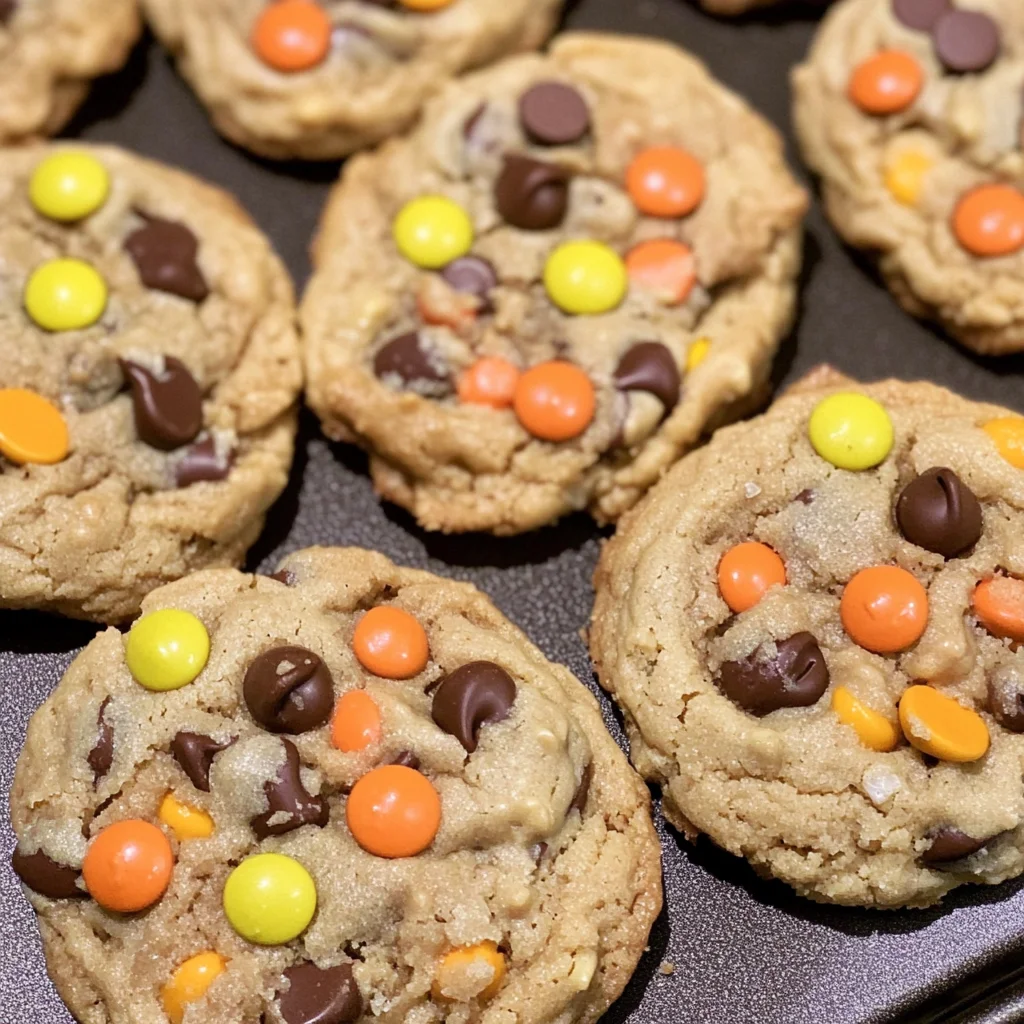
If you’re looking for a cookie that’s both fun and delicious, let me introduce you to my all-time favorite: Monster Cookies! These cookies are not just any ordinary treats; they are packed with peanut butter, oats, chocolate chips, and colorful Reese’s Pieces. Each bite is a delightful combination of chewy and crunchy textures that make them irresistible. I love whipping up a batch on busy weeknights or for family gatherings because they disappear in no time!
Not only are Monster Cookies great for satisfying your sweet tooth, but they also bring everyone together. Kids will love helping mix the dough, and the vibrant colors of the candies make them perfect for festive occasions like Halloween. Trust me, once you try these cookies, you’ll want to keep them in your recipe rotation forever!
Why You’ll Love This Recipe
- Easy to Make: With just a few simple steps, you can whip up a batch of Monster Cookies in no time!
- Family-Friendly Appeal: Everyone from kids to adults will enjoy these tasty cookies. They’re always a hit at gatherings!
- Make Ahead Convenience: You can prepare the dough ahead of time and bake fresh cookies whenever you need a treat.
- Delicious Flavor: The combination of peanut butter, oats, and chocolate makes each cookie rich and satisfying.

Ingredients You’ll Need
This recipe calls for simple, wholesome ingredients that you probably already have in your pantry. Let’s gather everything we need to create these delightful Monster Cookies!
For the Cookie Base
- 1/2 cup softened butter
- 1 cup brown sugar
- 1 cup peanut butter – creamy or crunchy
- 2 large eggs
- 2 teaspoons vanilla extract
Dry Ingredients
- 1 1/4 cup all-purpose flour
- 1 cup old-fashioned oats
- 1 teaspoon baking soda
- 1/2 teaspoon kosher salt
For the Fun Additions
- 1 cup semi-sweet chocolate chips
- 1 cup Reese’s Pieces candies
- Candy eyeball sprinkles (optional)
Variations
One of the best things about Monster Cookies is their flexibility! You can easily customize this recipe to suit your taste or what you have on hand.
- Swap the nut butter: If you’re not a fan of peanut butter, try using almond or cashew butter instead for a different flavor.
- Add dried fruits: Toss in some dried cranberries or raisins for a touch of sweetness and chewiness.
- Mix in seeds: For an extra crunch and nutrition boost, add pumpkin seeds or sunflower seeds into the mix.
- Go gluten-free: Substitute all-purpose flour with gluten-free flour blend to make these cookies suitable for gluten-sensitive friends.
How to Make Monster Cookies
Step 1: Preheat Your Oven
Preheat your oven to 375°F (190°C). This step is crucial because it ensures that your cookies bake evenly and turn out perfectly golden brown.
Step 2: Cream Butter and Sugar
In a large mixing bowl, add the softened butter and brown sugar. Use an electric mixer to beat them together until smooth—about 2 minutes. This process incorporates air into the mixture, giving your cookies a light texture.
Step 3: Mix in Peanut Butter and Eggs
Next, add the peanut butter, eggs, and vanilla extract to the bowl. Mix until everything is well combined. The creamy peanut butter adds richness while keeping the cookies chewy.
Step 4: Combine Dry Ingredients
Now it’s time to add your dry ingredients! Pour in the flour, oats, baking soda, and salt. Mix thoroughly until no dry spots remain. This blend creates that signature chewy texture we love in Monster Cookies.
Step 5: Fold in Chocolate Chips
Gently fold in the semi-sweet chocolate chips until evenly distributed throughout the dough. The chocolate adds melty goodness that pairs perfectly with the peanut butter flavor.
Step 6: Scoop Dough onto Baking Sheet
Using a medium cookie scoop, place dough balls about 2 inches apart on a greased or lined baking sheet. This spacing allows room for spreading as they bake!
Step 7: Flatten with a Fork
For that classic cookie look, gently mash each dough ball with a fork in a crosshatch pattern. If you notice any stickiness, sprinkle a little granulated sugar on top before flattening.
Step 8: Bake Until Golden Brown
Bake your cookies for about 10-12 minutes or until the edges are lightly browned. Keep an eye on them; you want them soft but set!
Step 9: Decorate with Candy Sprinkles
As soon as they come out of the oven, press a few Reese’s Pieces candies—and optional candy eyeball sprinkles—into each cookie while they’re still warm. This adds both fun decoration and extra flavor!
Step 10: Cool on Wire Rack
Let your cookies cool on a wire rack before munching on them. Cooling helps them firm up while preserving that chewy center we adore.
Step 11: Store Your Treats
Finally, store your cooled Monster Cookies in an airtight container for up to seven days (if they last that long!). Enjoy every delicious bite!
Pro Tips for Making Monster Cookies
Making Monster Cookies is a delightful experience, and a few handy tips can take your cookie game to the next level!
-
Use room temperature ingredients: Starting with softened butter and eggs helps create a smooth batter that mixes more evenly, resulting in beautifully uniform cookies.
-
Don’t overmix the dough: Mixing just until combined prevents the cookies from becoming tough. You want them to be chewy and soft, not dense!
-
Chill the dough (optional): If you have some extra time, chilling the dough for 30 minutes before baking can enhance the flavors and improve the texture. It also helps prevent spreading.
-
Experiment with mix-ins: While chocolate chips and Reese’s Pieces are delicious, try adding nuts or dried fruit for an extra twist. This keeps things exciting each time you bake!
-
Check for doneness carefully: Since ovens can vary, check your cookies around the 10-minute mark. They should look slightly underbaked in the center; they will continue to firm up as they cool.
How to Serve Monster Cookies
These Monster Cookies are not just delicious; they’re also fun to present! Whether you’re hosting a party or enjoying a cozy night at home, these cookies are sure to impress.
Garnishes
- Candy eyeball sprinkles: These whimsical sprinkles add a playful touch and make your cookies perfect for Halloween or any festive gathering.
- Drizzle of chocolate: Melt some semi-sweet chocolate and drizzle it over cooled cookies for an elegant finish that enhances their sweetness.
Side Dishes
- Milk: A classic pairing! Serve these cookies with cold milk for dipping – it’s a nostalgic combination that everyone loves.
- Ice cream: Warm cookies paired with a scoop of vanilla or chocolate ice cream create a delightful dessert experience, offering a beautiful contrast in temperature and texture.
- Fruit platter: Balance out the sweetness by serving fresh fruit like strawberries or apple slices on the side. This adds freshness and color to your dessert table.
- Coffee or tea: A steaming cup of coffee or herbal tea complements the rich flavors of these Monster Cookies perfectly, making them an ideal afternoon treat.
With these tips and serving ideas in mind, you’re all set to enjoy your Monster Cookies in style! Happy baking!
Make Ahead and Storage
Monster Cookies are perfect for meal prep because they can be made ahead of time and stored for later enjoyment. Their chewy texture and delicious flavor make them an ideal treat to have on hand for snacking or entertaining.
Storing Leftovers
- Store cooled cookies in an airtight container at room temperature for up to 7 days.
- If you prefer, separate layers of cookies with parchment paper to prevent sticking.
- Keep them in a cool, dry place away from direct sunlight.
Freezing
- Allow the cookies to cool completely before freezing.
- Place cookies in a single layer on a baking sheet and freeze until solid.
- Transfer frozen cookies to a freezer-safe bag or container, separating layers with parchment paper. They can be stored for up to 3 months.
Reheating
- For best results, reheat cookies in the oven at 350°F (175°C) for about 5 minutes until warm.
- Alternatively, use the microwave: heat one cookie at a time for about 10-15 seconds until soft.
FAQs
Here are some common questions about Monster Cookies that may help you as you bake!
Can I use different types of chocolate chips in Monster Cookies?
Absolutely! Feel free to mix and match chocolate chips based on your preferences. White chocolate or milk chocolate can add a delightful twist to these cookies.
What makes Monster Cookies different from regular peanut butter cookies?
Monster Cookies are unique because they include oats, which give them a chewy texture, along with a combination of chocolate chips and Reese’s Pieces that add extra flavor and fun. This makes them more colorful and flavorful than standard peanut butter cookies!
How long do Monster Cookies last?
When stored properly in an airtight container, Monster Cookies can last up to 7 days at room temperature. For longer storage, consider freezing them!
Can I use natural peanut butter for Monster Cookies?
Yes! Natural peanut butter can be used, but it may affect the consistency slightly since it tends to be more runny than traditional peanut butter. You may need to adjust the flour amount accordingly for the right dough consistency.
Final Thoughts
I hope this recipe for Monster Cookies brings joy to your kitchen as much as it does mine! These delightful cookies are not only fun to make but also irresistible with their chewy texture and combination of flavors. Whether you’re baking for yourself or sharing with friends, I’m sure everyone will love them! Happy baking, and enjoy every delicious bite!
Monster Cookies

Indulge in the delightful world of Monster Cookies, where chewy peanut butter meets the hearty goodness of oats, chocolate chips, and colorful candies! These cookies are a perfect blend of textures and flavors, making them a hit for both kids and adults alike. Ideal for busy weeknights or festive gatherings, Monster Cookies are not only simple to prepare but also bring a fun element to any occasion. Imagine the joy of baking these vibrant treats together as a family, creating lasting memories over delicious bites. Whether you’re looking for a sweet snack or a homemade dessert to impress guests, this recipe will become a staple in your kitchen!
- Prep Time: 15 minutes
- Cook Time: 12 minutes
- Total Time: 27 minutes
- Yield: About 24 cookies 1x
- Category: Dessert
- Method: Baking
- Cuisine: American
Ingredients
- 1/2 cup softened butter
- 1 cup brown sugar
- 1 cup peanut butter – creamy or crunchy
- 2 large eggs
- 2 teaspoons vanilla extract
- 1 1/4 cup all-purpose flour
- 1 cup old-fashioned oats
- 1 teaspoon baking soda
- 1/2 teaspoon kosher salt
- 1 cup semi-sweet chocolate chips
- 1 cup Reese's Pieces candies
- Candy eyeball sprinkles (optional)
Instructions
- Preheat your oven to 375°F (190°C).
- In a large bowl, cream together softened butter and brown sugar until smooth.
- Add peanut butter, eggs, and vanilla extract; mix until well combined.
- Stir in flour, oats, baking soda, and salt until just incorporated.
- Fold in chocolate chips and Reese's Pieces.
- Scoop dough onto a lined baking sheet, spacing 2 inches apart.
- Flatten each dough ball slightly with a fork.
- Bake for 10-12 minutes until edges are golden brown.
- Decorate with additional candy if desired and cool on a wire rack.
Nutrition
- Serving Size: 1 cookie (40g)
- Calories: 180
- Sugar: 12g
- Sodium: 120mg
- Fat: 8g
- Saturated Fat: 3g
- Unsaturated Fat: 5g
- Trans Fat: 0g
- Carbohydrates: 24g
- Fiber: 1g
- Protein: 4g
- Cholesterol: 15mg