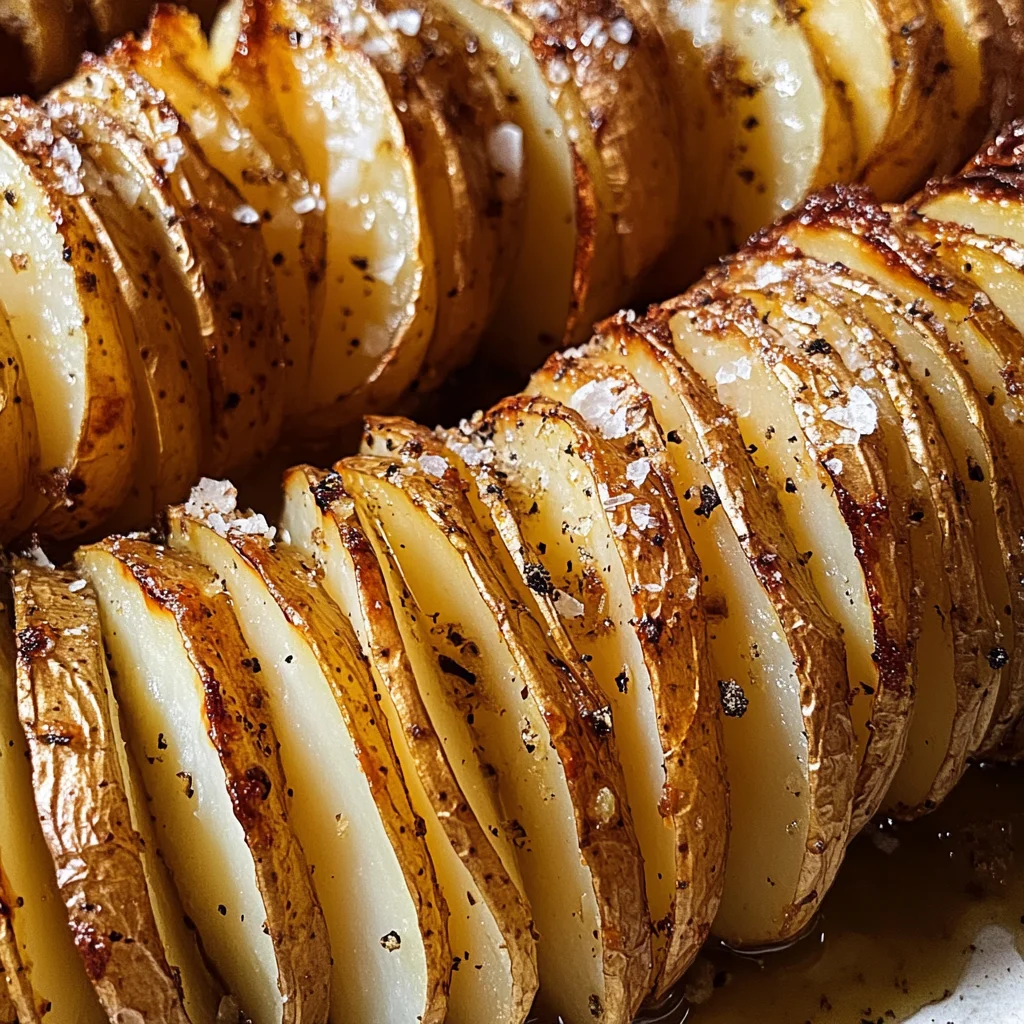
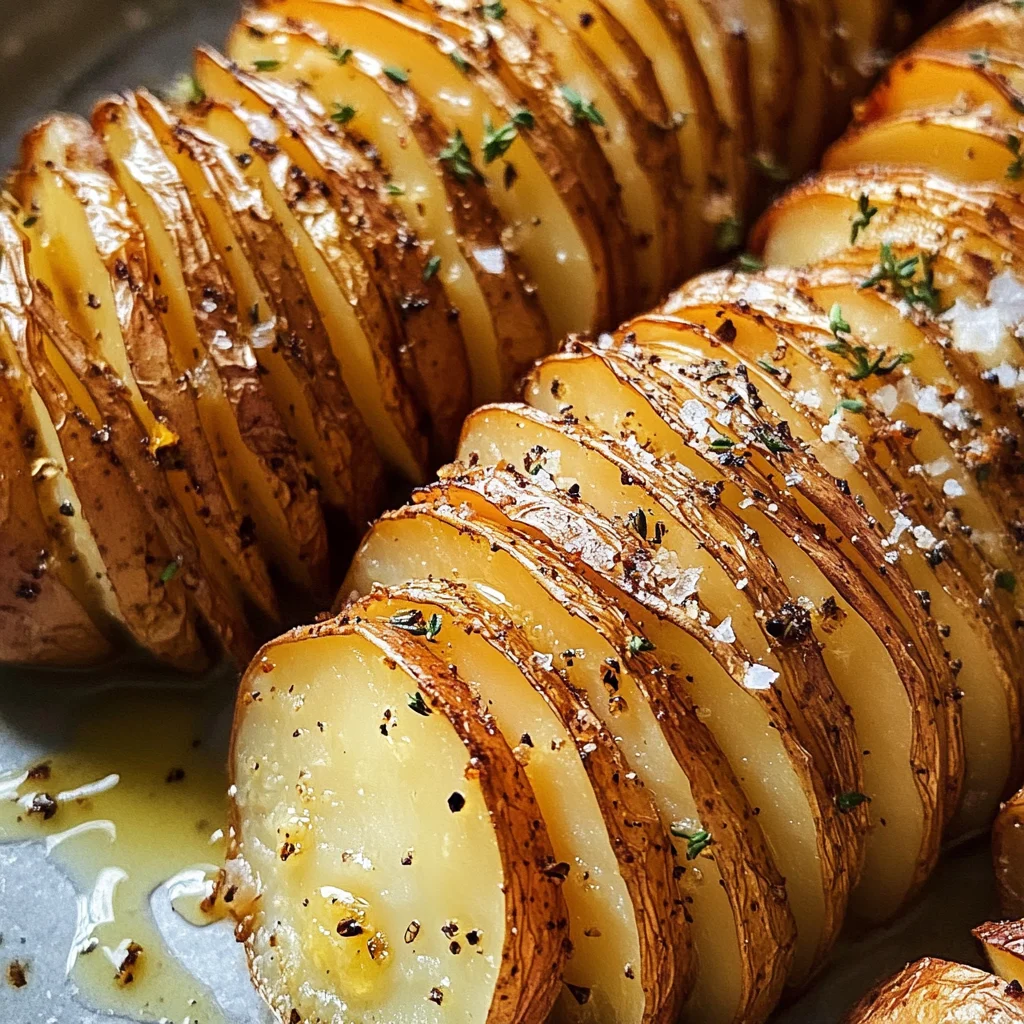
Hasselback Potatoes
If you’re looking for a delightful side dish that’s as impressive as it is simple, you’ve got to try Hasselback Potatoes! These beautifully fanned-out russet potatoes are not only a feast for the eyes but also a comforting treat for the taste buds. Whether it’s a busy weeknight dinner or a family gathering, this recipe fits perfectly into any occasion. Plus, it’s sure to be a hit with everyone at the table!
Hasselback Potatoes hold a special place in my heart because they combine crispy edges and creamy interiors. Each slice is an opportunity for flavor to seep in, making every bite utterly delicious. Let’s dive into why you’ll love making these fantastic potatoes!
Why You’ll Love This Recipe
- Quick to prepare: Hasselback Potatoes come together easily, with just 15 minutes of prep time before they go into the oven.
- Family-friendly: Everyone loves potatoes! This dish is sure to be a favorite among kids and adults alike.
- Perfectly crispy: The unique slicing technique allows for those delightful crispy edges while keeping the inside tender and fluffy.
- Versatile flavors: You can season them however you like—think garlic, herbs, or even cheese toppings if you want to get creative!
- Impressive presentation: Hasselback Potatoes look stunning on any dinner table, making them great for entertaining guests.
Ingredients You’ll Need
Let’s gather our ingredients! This recipe uses simple, wholesome items that are easy to find. You probably have most of them in your kitchen already!
- 4 large russet potatoes, (washed and patted dry)
- 4 tablespoons unsalted butter, (melted, divided)
- 1 teaspoon kosher salt
- ½ teaspoon pepper
- Salt and pepper, (to taste)
Variations
One of the best things about Hasselback Potatoes is their flexibility! Feel free to adapt the recipe based on your preferences or what you have on hand.
- Add some garlic: Mince a few cloves of garlic and mix them with the melted butter for an extra burst of flavor.
- Herb-infused goodness: Sprinkle fresh herbs like rosemary or thyme between the slices before baking to enhance the aroma.
- Cheesy delight: In the last few minutes of baking, sprinkle some shredded cheese between the slices for a gooey finish.
- Spice it up: For those who love a kick, add some chili flakes or paprika to the butter mixture before brushing.
How to Make Hasselback Potatoes
Step 1: Preheat Your Oven
Arrange a rack in the middle position of your oven and preheat it to 425°F. This temperature allows your potatoes to bake evenly and develop that delightful crispiness we all crave. Don’t forget to set aside an unlined baking sheet!
Step 2: Prepare Your Potatoes
Position one potato between two chopsticks or skewers. This trick prevents you from cutting all the way through. With your knife, cut vertical slits about ⅛ inch apart down into each potato until you hit the chopsticks. Repeat this for all your potatoes, allowing them to fan out beautifully.
Step 3: Butter Them Up
Place the prepared potatoes on your baking dish. Using a basting brush, generously coat about half of that melted butter all over each potato—including those lovely inner slits! This step is crucial as it helps create that golden-brown color and rich flavor we’re after.
Step 4: Seasoning Time
Sprinkle salt and pepper over your potatoes. This is where you can get creative too! Make sure each slice gets seasoned so every bite packs a flavorful punch.
Step 5: Bake Away!
Pop those beauties into your preheated oven and bake for 30 minutes. After this time, gently pull apart the layers slightly using a knife—this helps them crisp up even more! Brush on your remaining melted butter at this stage.
Step 6: Final Bake
Return the potatoes to bake for another 30-35 minutes until they’re perfectly crispy on the outside and tender on the inside. Just keep an eye on them; cooking times may vary depending on how big your potatoes are.
Step 7: Serve Warm
Once they’re out of the oven, serve your Hasselback Potatoes warm. Adjust with extra salt and pepper if needed, and enjoy every delicious bite!
These Hasselback Potatoes are not just food; they’re comfort served on a plate! I hope you enjoy making this recipe as much as I do. Happy cooking!
Pro Tips for Making Hasselback Potatoes
Making the perfect Hasselback Potatoes can be a delightful experience, and with a few simple tips, you’ll impress everyone at the table!
-
Use a sharp knife: A sharp knife will make it easier to cut even slits into your potatoes without crushing them, ensuring that the layers fan out beautifully during baking.
-
Experiment with butter alternatives: If you’re looking to reduce dairy, try using olive oil or a plant-based butter. These options still provide great flavor while keeping the dish lighter.
-
Season generously: Don’t be shy with your salt and pepper! The seasoning seeps into every crevice of your potatoes, enhancing their flavor and making them irresistible.
-
Add cheese for extra richness: If you enjoy cheese, sprinkle some shredded cheese between the slits during the last 10 minutes of baking. This adds a wonderful gooey texture that complements the potatoes perfectly.
-
Try different herbs and spices: Consider incorporating fresh herbs like rosemary or thyme, or spices such as garlic powder or paprika. These additions can bring a unique twist to your Hasselback Potatoes.
How to Serve Hasselback Potatoes
Hasselback Potatoes are not only delicious but also visually stunning! Here are some ideas on how to present this delightful dish to wow your guests.
Garnishes
- Chopped fresh herbs: Sprinkle some parsley or chives on top right before serving for an added burst of color and freshness.
- Sour cream or plant-based yogurt: A dollop of sour cream or plant-based yogurt can add a creamy element that balances out the crispy texture of the potatoes.
- Crumbled feta or non-dairy cheese: For a salty kick, crumbled feta or non-dairy cheese on top enhances both flavor and presentation.
Side Dishes
-
Garlic Roasted Broccoli: This side is simple yet flavorful, with broccoli florets roasted until tender and slightly charred. The garlic adds an aromatic complement to your potatoes.
-
Quinoa Salad: A refreshing quinoa salad mixed with cherry tomatoes, cucumber, and a light vinaigrette pairs perfectly with the rich flavors of Hasselback Potatoes while adding nutritional value.
-
Grilled Asparagus: Lightly seasoned asparagus spears grilled until they’re crisp-tender provide a nice contrast in texture and taste alongside your baked potatoes.
-
Crispy Brussels Sprouts: Roasted Brussels sprouts tossed in balsamic glaze offer a sweet-tart flavor that wonderfully balances the richness of the potatoes.
With these serving suggestions, your Hasselback Potatoes will not only steal the show but also create memorable mealtime experiences! Enjoy cooking and sharing this delightful dish!
Make Ahead and Storage
Hasselback Potatoes are not only delicious but also a fantastic option for meal prep. You can make them ahead of time and store them for a quick side dish throughout the week.
Storing Leftovers
- Allow the potatoes to cool completely before storing.
- Place any leftovers in an airtight container.
- Store in the refrigerator for up to 3 days.
Freezing
- Bake and cool the potatoes completely.
- Wrap each potato tightly in aluminum foil or plastic wrap.
- Place wrapped potatoes in a freezer-safe bag or container.
- Freeze for up to 2 months.
Reheating
- Preheat your oven to 375°F (190°C).
- Remove the potatoes from their wrapping and place them on a baking sheet.
- Bake for about 20-25 minutes, or until heated through.
- Optionally, brush with a little melted butter before reheating for extra flavor.
FAQs
Here are some common questions about Hasselback Potatoes:
Can I make Hasselback Potatoes in advance?
Absolutely! You can prepare the potatoes ahead of time, store them in the fridge, and reheat them when you’re ready to serve.
What are Hasselback Potatoes?
Hasselback Potatoes are russet potatoes that are sliced thinly but not all the way through, allowing them to fan out beautifully while baking. They’re crispy on the outside and fluffy on the inside!
Can I use other types of potatoes for Hasselback Potatoes?
Yes! While russet potatoes are traditional, you can experiment with other varieties like Yukon Gold or sweet potatoes for different flavors.
How do I know when my Hasselback Potatoes are done?
Your Hasselback Potatoes should be crispy on the outside and tender on the inside. A fork should easily pierce through without resistance.
Final Thoughts
I hope this recipe brings a touch of joy and warmth to your table! Hasselback Potatoes are not only visually stunning but also deliciously satisfying. Whether enjoyed as a comforting side dish or paired with your favorite protein, they’re sure to impress. Happy cooking, and I can’t wait for you to try making these delightful potatoes!
Hasselback Potatoes

Experience the ultimate comfort food with our Hasselback Potatoes, a visually stunning side dish that combines crispy edges with a fluffy interior. These beautifully fanned-out russet potatoes are not only easy to prepare but also make a delightful addition to any meal, from busy weeknight dinners to festive gatherings. With each slice allowing flavors to seep in, every bite is a perfect blend of textures and tastes. Customize your Hasselback Potatoes with various seasonings, cheeses, or herbs for an impressive presentation that will wow your guests. Elevate your dining experience and enjoy this delicious recipe today!
- Prep Time: 15 minutes
- Cook Time: 65 minutes
- Total Time: 1 hour 20 minutes
- Yield: Serves 4
- Category: Side dish
- Method: Baking
- Cuisine: American
Ingredients
- 4 large russet potatoes
- 4 tablespoons melted unsalted butter
- 1 teaspoon kosher salt
- ½ teaspoon black pepper
Instructions
- Preheat your oven to 425°F (220°C).
- Place one potato between two chopsticks or skewers and cut vertical slits about ⅛ inch apart without slicing all the way through. Repeat with all potatoes.
- Arrange the potatoes on a baking sheet and brush half of the melted butter over them, including inside the slits.
- Season generously with salt and pepper.
- Bake for 30 minutes; gently pull apart the layers with a knife and brush on the remaining butter.
- Return to the oven for another 30-35 minutes until crispy on the outside and tender on the inside.
- Serve warm, adding extra salt and pepper as needed.
Nutrition
- Serving Size: 1 potato (approx. 200g)
- Calories: 210
- Sugar: 1g
- Sodium: 460mg
- Fat: 9g
- Saturated Fat: 5g
- Unsaturated Fat: 4g
- Trans Fat: 0g
- Carbohydrates: 36g
- Fiber: 4g
- Protein: 3g
- Cholesterol: 15mg