Halloween No Bake Cheesecake
If you’re looking for a fun and festive dessert to celebrate the spooky season, this Halloween No Bake Cheesecake is just what you need! It’s a creamy and colorful treat that’s perfect for any gathering. Whether it’s a family dinner or a Halloween party, everyone will adore this simple yet delightful dessert. Plus, it comes together in less than 10 minutes, allowing you to enjoy more time with your loved ones instead of being stuck in the kitchen!
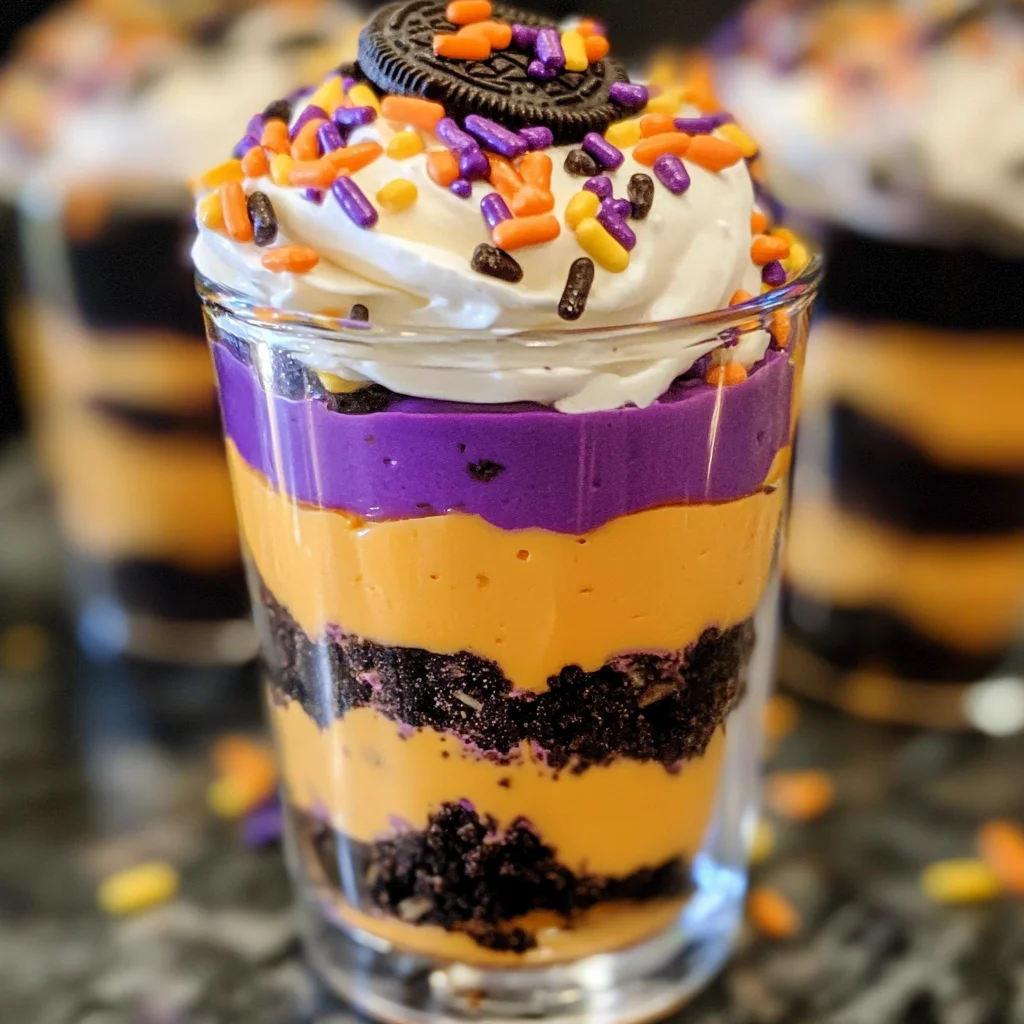
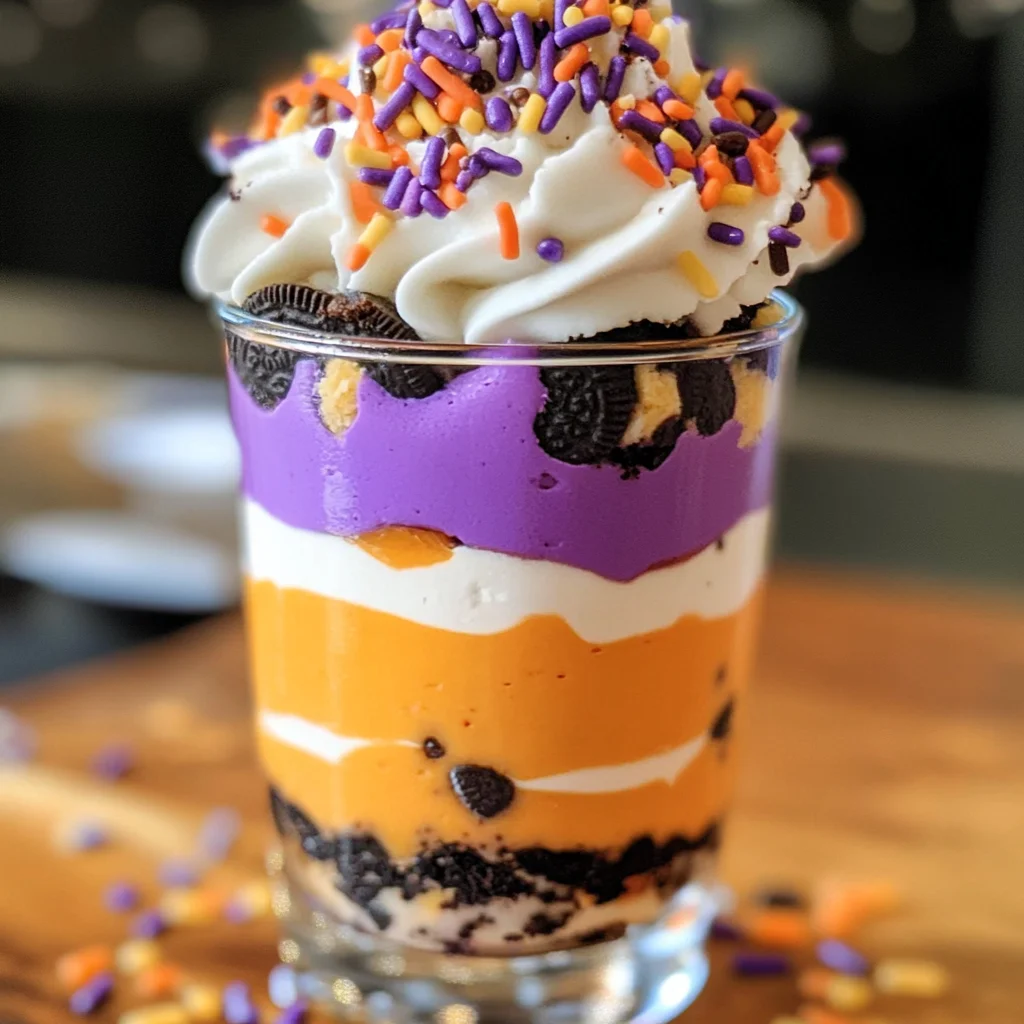
What makes this recipe so special is its vibrant orange and purple layers, inspired by classic Halloween colors. Not only is it visually appealing, but it’s also rich and delicious without the fuss of baking. Trust me, once you try this cheesecake, it will become a go-to favorite for all your fall celebrations.
Why You’ll Love This Recipe
- Quick and Easy: This Halloween No Bake Cheesecake requires minimal prep time—less than 10 minutes! Perfect for busy days.
- Family-Friendly: Kids love the fun colors and flavors, making it an excellent choice for family gatherings or school parties.
- Make Ahead Convenience: You can whip this up in advance and let it chill in the fridge until you’re ready to serve.
- Deliciously Creamy: The combination of whipped cream and cream cheese creates a rich and satisfying texture that everyone will enjoy.
- Customizable Fun: With easy variations, you can personalize your cheesecake to suit different tastes and occasions!
Ingredients You’ll Need
This recipe calls for simple, wholesome ingredients that you may already have at home. Let’s gather everything you need to create this delightful Halloween No Bake Cheesecake!
For the Cheesecake Filling
- 2 cups heavy whipping cream
- 1 cup powdered sugar
- 1 teaspoon vanilla extract
- 8 ounces cream cheese (softened)
- orange gel food coloring
- purple gel food coloring
For the Crust
- 8 Oreo cookies
For Topping
- sprinkles
Variations
The great thing about this Halloween No Bake Cheesecake is how flexible it is! Here are some fun ideas to give your dessert a unique twist:
- Switch Up the Colors: Feel free to use different gel food colorings to match your party theme—think green for monsters or red for a blood-red treat!
- Add Flavor Extracts: Try adding almond or lemon extract to the cheesecake filling for a hint of extra flavor.
- Use Different Cookies: Swap out Oreos for other types of cookies like chocolate wafers or graham crackers for a different crust experience.
- Top with Fruit: Add fresh fruit like raspberries or strawberries on top instead of sprinkles for a fresh twist!
How to Make Halloween No Bake Cheesecake
Step 1: Whip the Cream
Start by adding heavy whipping cream to your mixer bowl. Beat it at medium speed until it begins to thicken. This step is crucial because stiff peaks give our cheesecake its light and airy texture. Once thickened, raise the speed to high until those beautiful stiff peaks form. Then, add in powdered sugar and vanilla extract, mixing until everything is perfectly combined.
Step 2: Prepare the Cream Cheese Mixture
In another bowl, add softened cream cheese and beat until it becomes light and fluffy—this usually takes about 2-3 minutes. This step ensures that the cream cheese blends smoothly into the whipped mixture later on.
Step 3: Combine Whipped Cream with Cream Cheese
Now’s the time to take that large bowl of sweetened whipped cream we made earlier and fold it into the cream cheese mixture using medium speed. This combination creates that luscious cheesecake filling we all crave!
Step 4: Color Your Layers
Divide your filling into two bowls. Add 8-10 drops of orange gel food coloring to one bowl and purple food coloring to the other. Stir each color gently until fully combined—using separate spoons helps maintain those vibrant colors without mixing them up!
Step 5: Prepare Your Piping Bags
Spoon each colored filling into its own piping bag (or zip-top bag with a corner cut off). Don’t forget to set aside some plain whipped cream in another piping bag too! This will be used as a delightful topping later.
Step 6: Crush Your Cookies
Place Oreo cookies in a zip-top bag and seal it tightly after squeezing out excess air. Use a rolling pin to crush them into fine crumbs—a method that’s both satisfying and easy! These crumbs will form our delicious base layer.
Step 7: Assemble Your Cheesecakes
In serving glasses (or any cute cups), start by spooning in crushed Oreo cookies as your base layer. Next, pipe alternating layers of orange and purple cheesecake filling into each glass. Top off with some reserved whipped cream and sprinkle with colorful sprinkles for that festive touch.
Step 8: Chill Before Serving
Finally, pop these beauties into the refrigerator for at least three hours before serving. Chilling helps set everything nicely so that when it’s time to dig in, you’ll have perfectly layered cheesecakes ready to impress!
Enjoy your Halloween No Bake Cheesecake—it truly is an enchanting treat that’s sure to bewitch everyone who tries it!
Pro Tips for Making Halloween No Bake Cheesecake
Creating a delightful Halloween No Bake Cheesecake can be a breeze with these helpful tips to ensure your dessert turns out perfectly every time!
-
Use room temperature cream cheese: This helps the cream cheese blend smoothly into the mixture without lumps, guaranteeing a creamy texture for your cheesecake.
-
Chill your mixing bowl: Placing your mixer bowl in the fridge or freezer for a few minutes before whipping the cream can help it whip up faster and achieve those perfect stiff peaks.
-
Alternate colors carefully: When layering the orange and purple fillings, try to keep a steady hand. This will create beautifully defined layers that not only look stunning but add to the fun of serving!
-
Get creative with serving glasses: Using clear cups or jars allows everyone to see those vibrant layers. Plus, they can double as an eye-catching centerpiece for your Halloween party!
-
Don’t skip the chilling time: Allowing the cheesecake to chill for at least 3 hours helps it set properly, making it easier to serve and enhancing the flavors.
How to Serve Halloween No Bake Cheesecake
Serving your Halloween No Bake Cheesecake creatively can make it even more festive and enjoyable for everyone. Here are some ideas to elevate your presentation!
Garnishes
- Whipped cream: A dollop of freshly whipped cream on top adds a lovely finishing touch and gives each serving an airy feel.
- Chocolate shavings: Sprinkling some chocolate shavings over the top adds a rich flavor contrast and makes the dessert visually appealing.
- Edible glitter or ghost sprinkles: For an extra fun touch, sprinkle some edible glitter or spooky-themed sprinkles on top to give your cheesecake that festive flair!
Side Dishes
- Fresh fruit salad: A light fruit salad pairs well with the richness of the cheesecake, providing a refreshing contrast with seasonal fruits like apples and pears.
- Pumpkin spice cookies: These cozy cookies enhance the autumn vibes and are perfect for nibbling alongside your cheesecake.
- Caramel popcorn: The sweet crunch of caramel popcorn adds texture and is always a hit at parties, complementing the creamy dessert perfectly.
- Chocolate-covered pretzels: The salty-sweet combination of chocolate-covered pretzels brings an exciting flavor dynamic to your dessert table.
By following these tips and serving suggestions, you’ll create an unforgettable experience with your Halloween No Bake Cheesecake that friends and family will love!
Make Ahead and Storage
This Halloween No Bake Cheesecake is not only a delight to make, but it also shines as a fantastic option for meal prep! You can whip up this treat ahead of time, making it perfect for parties or cozy gatherings.
Storing Leftovers
- Cover each serving glass with plastic wrap or transfer portions to an airtight container.
- Store in the refrigerator for up to 3 days.
- Avoid freezing leftovers, as the texture may change when thawed.
Freezing
- This cheesecake can be frozen before adding whipped cream and sprinkles.
- Wrap individual servings tightly in plastic wrap and then place them in a freezer-safe bag.
- Freeze for up to 1 month. Thaw in the refrigerator overnight before serving.
Reheating
- There’s no need to reheat this cheesecake; it’s best served chilled!
- If you prefer, allow it to sit at room temperature for about 10-15 minutes before serving for a softer texture.
FAQs
Here are some common questions you might have about making this Halloween No Bake Cheesecake!
Can I use different colors for the Halloween No Bake Cheesecake?
Absolutely! Feel free to get creative with your gel food coloring. You can use green and black or any other colors that fit your Halloween theme!
How long does the Halloween No Bake Cheesecake need to chill?
The cheesecake should chill for at least 3 hours before serving. This allows it to set properly and enhances the flavors.
Is there a way to make this Halloween No Bake Cheesecake dairy-free?
You can substitute the heavy whipping cream with coconut cream and use dairy-free cream cheese alternatives. Just ensure all ingredients fit your dietary preferences!
Can I use another type of cookie instead of Oreos?
Yes! You can replace Oreos with any chocolate or graham cracker cookies you enjoy. Just make sure they are crushed into fine crumbs for layering.
Final Thoughts
I hope this Halloween No Bake Cheesecake brings joy and sweetness to your fall festivities! Its simple preparation and delightful flavors make it a must-try recipe that everyone will love. Enjoy making it, share it with friends and family, and let the spirit of Halloween inspire your creativity in the kitchen!
Halloween No Bake Cheesecake
Get ready to impress your guests this Halloween with a vibrant and delicious No Bake Cheesecake! This fun dessert features colorful layers of creamy cheesecake that are not only visually stunning but also easy to prepare. With a quick prep time of just 10 minutes, you can spend less time in the kitchen and more time enjoying the festivities. Perfect for family gatherings or Halloween parties, this dessert is sure to be a hit with both kids and adults alike. The rich flavors combined with a delightful Oreo crust will make it your go-to treat for all autumn celebrations!
- Prep Time: 10 minutes
- Cook Time: None
- Total Time: 0 hours
- Yield: Serves 6
- Category: Dessert
- Method: No Bake
- Cuisine: American
Ingredients
- 2 cups heavy whipping cream
- 1 cup powdered sugar
- 1 teaspoon vanilla extract
- 8 ounces cream cheese (softened)
- Orange gel food coloring
- Purple gel food coloring
- 8 Oreo cookies (for crust)
- Sprinkles (for topping)
Instructions
- In a mixing bowl, whip the heavy cream until stiff peaks form. Add powdered sugar and vanilla extract, mixing until combined.
- In another bowl, beat softened cream cheese until light and fluffy.
- Fold whipped cream into the cream cheese mixture until well mixed.
- Divide filling into two bowls; add orange gel food coloring to one and purple to another, mixing gently.
- Crush Oreo cookies in a zip-top bag; layer crumbs in serving glasses.
- Pipe alternating layers of orange and purple cheesecake filling into each glass.
- Top with reserved whipped cream and sprinkles.
- Chill in the refrigerator for at least 3 hours before serving.
Nutrition
- Serving Size: 1 dessert glass (150g)
- Calories: 450
- Sugar: 30g
- Sodium: 120mg
- Fat: 35g
- Saturated Fat: 20g
- Unsaturated Fat: 12g
- Trans Fat: 0g
- Carbohydrates: 32g
- Fiber: 1g
- Protein: 4g
- Cholesterol: 100mg