Halloween Pudding Cups
If you’re looking for a fun and festive dessert that will wow your friends and family this Halloween, you’ve come to the right place! Halloween Pudding Cups are not just visually stunning; they’re also deliciously layered with chocolate cake, creamy pudding, and crushed Oreos. This recipe brings out your inner child, making it perfect for parties, family gatherings, or even just a cozy night in with loved ones. It’s an easy treat to whip up, and trust me, everyone will be asking for seconds!
What makes these Halloween Pudding Cups special is their playful twist on the classic dirt cup recipe. They’re a delightful combination of textures and flavors that scream Halloween. Plus, they’re super easy to make ahead of time, so you can enjoy all the spooky fun without any last-minute stress.
Why You’ll Love This Recipe
- Easy to prepare: With simple steps and straightforward ingredients, you’ll have these delicious cups ready in no time.
- Family-friendly appeal: Kids love getting involved in creating these colorful layers and decorating them with candy!
- Perfect for parties: Whether it’s a Halloween bash or a fall gathering, these pudding cups will surely impress your guests.
- Make-ahead convenience: You can prepare them a day in advance and store them in the fridge until it’s time to serve.
- Customizable colors: You can play with food coloring to create vibrant layers that match your party theme!
Ingredients You’ll Need
Let’s gather our simple and wholesome ingredients! These are not only easy to find but also perfect for creating those delightful layers of flavor in our Halloween Pudding Cups.
For the Cake Layer
- 1 15.25 ounce box devils food cake
- Water (plus oil and eggs as directed on the box)
For the Pudding Layer
- 2 3.4 ounce boxes white chocolate instant pudding
- 4 cups cold milk
- 8 ounces whipped topping
- Neon green (and orange and purple food coloring)
For Decoration
- 1 ½ cups crushed Oreo cookies
- Milano cookies
- Halloween candy and sprinkles for decor
- 10 8 ounce clear buckets
Variations
This recipe is wonderfully flexible! Feel free to get creative with your ingredients and make these pudding cups your own.
- Add different flavors: Instead of white chocolate pudding, try vanilla or even butterscotch for a unique twist!
- Mix in some fruit: Add layers of mashed bananas or strawberries between the pudding layers for extra flavor.
- Change up the toppings: Use gummy worms or spooky candy eyes instead of traditional sprinkles for a fun surprise!
- Try gluten-free options: Substitute gluten-free cake mix and Oreos if you have dietary restrictions.
How to Make Halloween Pudding Cups
Step 1: Bake the Cake
Preheat your oven to 350 degrees. Grease up your 9×13 baking dish. This step is crucial because it ensures that your cake comes out perfectly moist while being easy to slice later on. In a large bowl, mix together the devils food cake mix with water, oil, and eggs as per the package instructions. Pour this delicious batter into your prepared dish and bake according to the box directions. Once baked, let it cool completely on a cooling rack before slicing it into bite-sized squares.
Step 2: Prepare the Pudding
While your cake cools down, it’s time to whip up that creamy pudding! In another bowl, combine the two boxes of white chocolate instant pudding with 4 cups of cold milk. Whisk until it thickens—this might take a couple of minutes but hang in there! Once thickened nicely, divide this mixture into three separate bowls. Now comes the fun part: add neon food coloring to each bowl until you achieve those vibrant Halloween hues you desire!
Step 3: Layer Your Cups
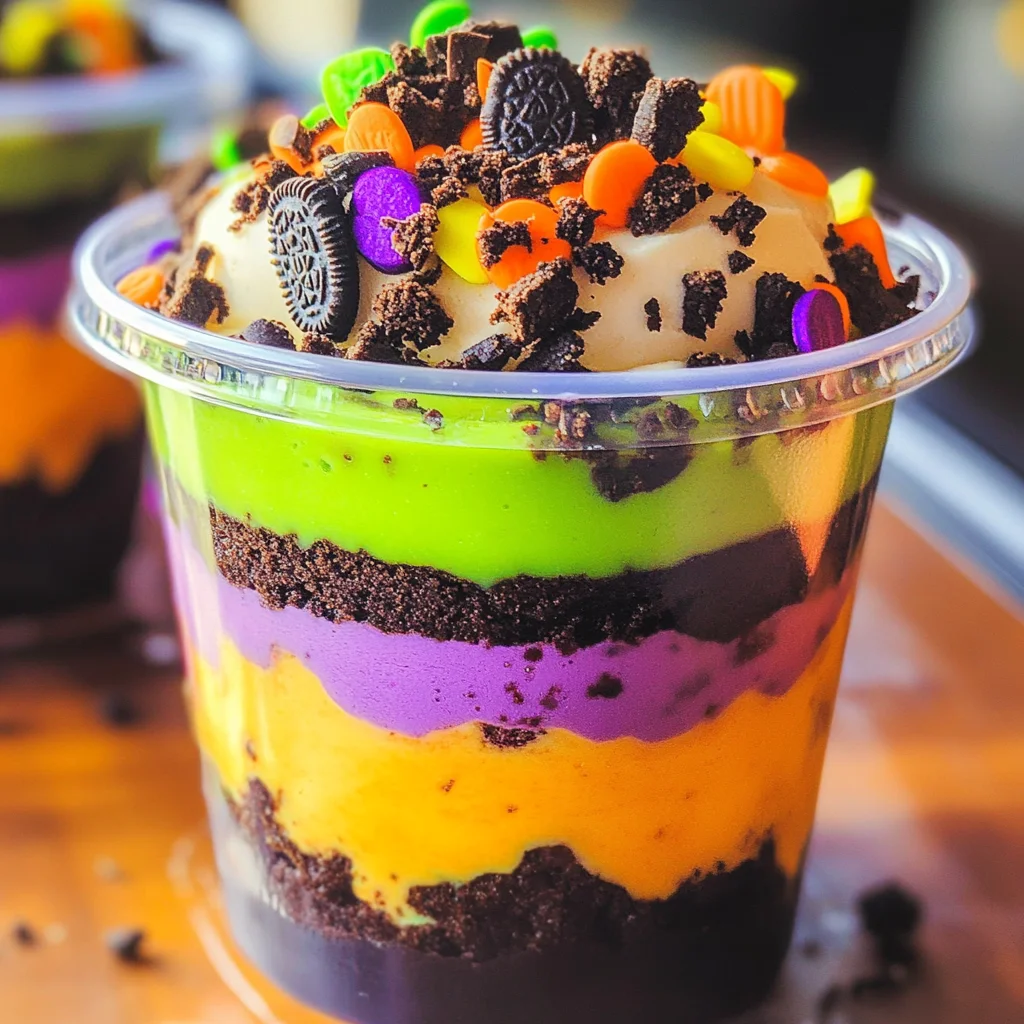
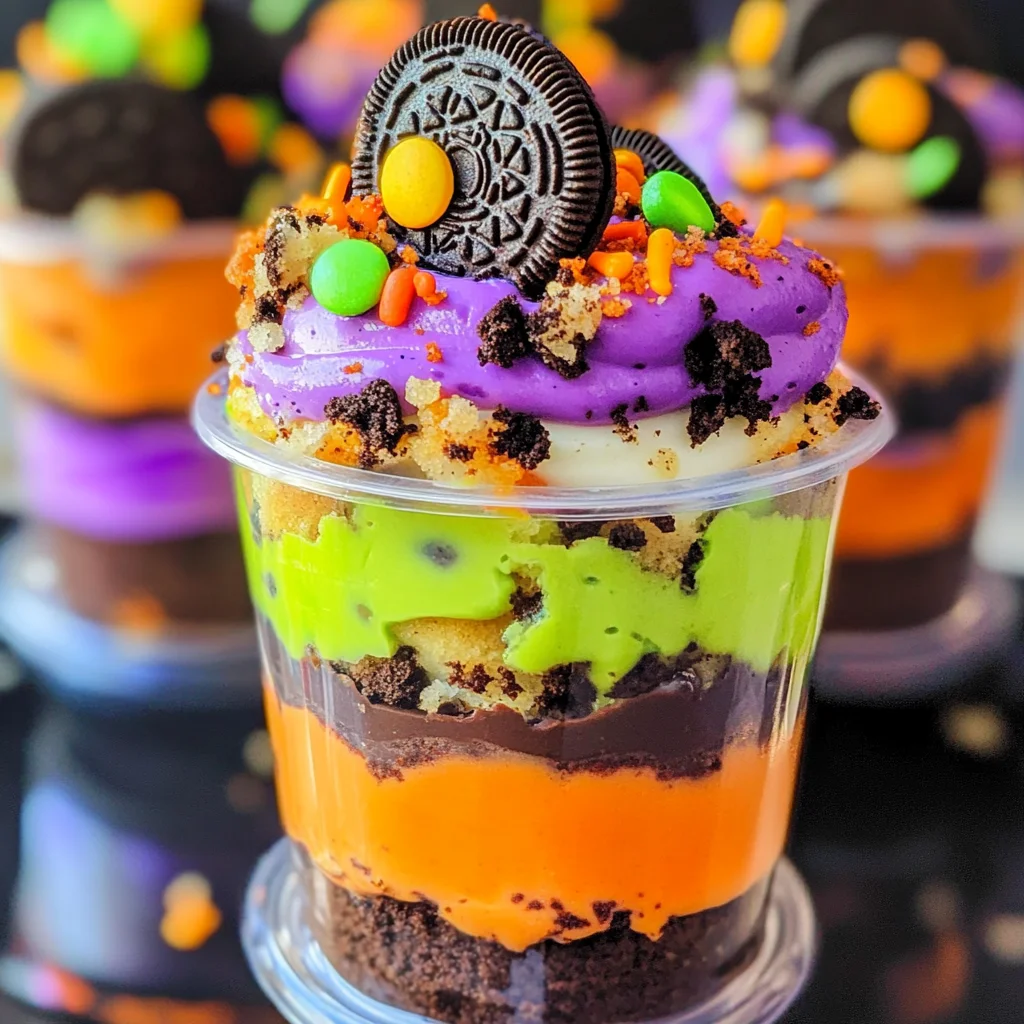
It’s time for assembly! Grab those clear buckets you’ve prepared. Start by adding a layer of chocolate cake at the bottom of each bucket—about one-third full should do it. Next, pour in a layer of one color of pudding over the cake layer. Follow this with another layer of cake topped by another color of pudding. Repeat until you fill each cup almost to the top!
Step 4: Decorate
To finish off these spooky delights, sprinkle crushed Oreo cookies on top for that classic “dirt” look! Then add some Milano cookies standing upright as gravestones or decorate with Halloween candies and sprinkles for that festive flair!
And there you have it—your very own Halloween Pudding Cups ready to be enjoyed! These treats are sure to bring smiles all around during this festive season. Enjoy every bite!
Pro Tips for Making Halloween Pudding Cups
Creating the perfect Halloween Pudding Cups can be a delightful experience with just a few handy tips!
-
Use Fresh Ingredients: Always check that your cake mix and pudding are within their expiration dates. Fresh ingredients ensure the best flavor and texture in your dessert.
-
Layer Creatively: When layering your pudding cups, consider using different piping bags for each color of pudding. This allows you to create visually stunning layers that will impress your guests!
-
Chill Before Serving: Allow your assembled pudding cups to chill in the refrigerator for at least an hour before serving. This helps the flavors meld together and makes for a refreshing treat.
-
Play with Textures: Add different textures by using crushed cookies or candies between layers. This not only enhances the taste but also creates an exciting mouthfeel with every bite.
-
Get Creative with Colors: Don’t be afraid to mix food colors to achieve unique shades! This can add a fun twist to your Halloween theme, making each cup more festive.
How to Serve Halloween Pudding Cups
Serving your Halloween Pudding Cups creatively can make them even more enjoyable. Here are some ideas on how to present this delightful dessert at your next gathering!
Garnishes
-
Sprinkle Some Fun: Add colorful Halloween-themed sprinkles on top of each cup for a festive touch that catches the eye.
-
Add Edible Eyes: Place some edible candy eyes on top of the whipped topping for a spooky effect that kids and adults alike will love.
Side Dishes
-
Ghostly Fruit Salad: A light fruit salad made with ghost-shaped melon balls adds a refreshing contrast to the rich pudding cups—perfect for balancing flavors!
-
Creepy Crudité Platter: Offer a platter of veggies shaped like monsters or ghosts, served with a delicious dip. This healthy option provides a nice crunch alongside the sweetness of the dessert.
-
Mummy Dogs: Wrap crescent roll dough around hot dogs and bake until golden brown. These fun snacks complement the sweet pudding cups while keeping the party vibe alive.
-
Pumpkin Spice Muffins: Soft, spiced muffins bring warmth and coziness to your dessert table, making them an excellent pairing for the Halloween Pudding Cups.
With these tips and serving suggestions, you can create an unforgettable Halloween dessert experience that will delight everyone at your celebration! Enjoy crafting these delightful treats and have a spooktacular time!
Make Ahead and Storage
These Halloween Pudding Cups are perfect for meal prep, allowing you to enjoy a delightful dessert without the stress of last-minute preparations. You can easily make them ahead of time and store them for those spooky gatherings!
Storing Leftovers
- Place any leftover pudding cups in an airtight container.
- Store in the refrigerator for up to 3 days.
- If using candy decorations, consider adding them just before serving to maintain their crunch.
Freezing
- Unfortunately, freezing is not recommended for these pudding cups as the texture of the pudding may change.
- However, you can freeze leftover cake squares separately and use them later in other desserts.
Reheating
- There’s no need to reheat these pudding cups; they are best enjoyed cold!
- If you have leftover cake squares that you want to warm up, place them in a microwave-safe dish and heat for 10-15 seconds until slightly warm.
FAQs
Here are some common questions about making Halloween Pudding Cups!
Can I use a different flavor of pudding for Halloween Pudding Cups?
Absolutely! While white chocolate gives a lovely base, vanilla or even chocolate pudding can be used to create delicious variations of your Halloween Pudding Cups.
How do I decorate my Halloween Pudding Cups?
Get creative! Use Halloween-themed candies like gummy worms or candy corn, and sprinkle colorful edible decorations on top. The options are endless for customizing your Halloween Pudding Cups!
How long do Halloween Pudding Cups last?
If stored properly in the refrigerator, your delightful Halloween Pudding Cups will last up to 3 days. Just make sure to keep them covered to maintain freshness!
Can I make these Halloween Pudding Cups vegan-friendly?
Certainly! Substitute the whipped topping with a plant-based alternative and use egg replacers in the cake mix according to package instructions. This way, everyone can enjoy the festive treat!
Final Thoughts
I hope you find joy in creating these whimsical Halloween Pudding Cups! They’re not just a treat but a way to share smiles and sweet moments with friends and family. Enjoy every layered bite and feel free to get creative with your decorations. Happy haunting in the kitchen—can’t wait for you to try this recipe!
Halloween Pudding Cups
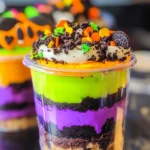
Get ready for a spooktacular treat with these Halloween Pudding Cups! Layered with moist chocolate cake, creamy pudding, and crunchy crushed cookies, these delightful cups are the perfect festive dessert for parties or cozy gatherings. Not only do they look impressive, but they’re also incredibly easy to prepare. Kids will love helping decorate these colorful cups, making them a hit at any Halloween celebration. With their playful twist on classic dessert cups, these spooky treats will leave everyone asking for seconds!
- Prep Time: 30 minutes
- Cook Time: 30 minutes
- Total Time: 1 hour
- Yield: 10 servings 1x
- Category: Dessert
- Method: Baking
- Cuisine: American
Ingredients
- 1 box devils food cake mix
- 2 boxes white chocolate instant pudding
- 4 cups cold milk
- 8 ounces whipped topping
- Neon food coloring (green, orange, purple)
- 1½ cups crushed Oreo cookies
- Halloween candy and sprinkles for decoration
Instructions
- Preheat the oven to 350°F and grease a 9×13 baking dish. Prepare the cake mix according to package instructions and bake until done. Let cool completely before cutting into squares.
- In a bowl, whisk together pudding mix and milk until thickened. Divide into three bowls and add food coloring to each.
- In clear buckets, layer chocolate cake followed by layers of colored pudding until nearly full.
- Top with crushed Oreos and decorate with candies as desired.
Nutrition
- Serving Size: 1 pudding cup (150g)
- Calories: 290
- Sugar: 26g
- Sodium: 240mg
- Fat: 10g
- Saturated Fat: 4g
- Unsaturated Fat: 6g
- Trans Fat: 0g
- Carbohydrates: 43g
- Fiber: 1g
- Protein: 4g
- Cholesterol: 5mg