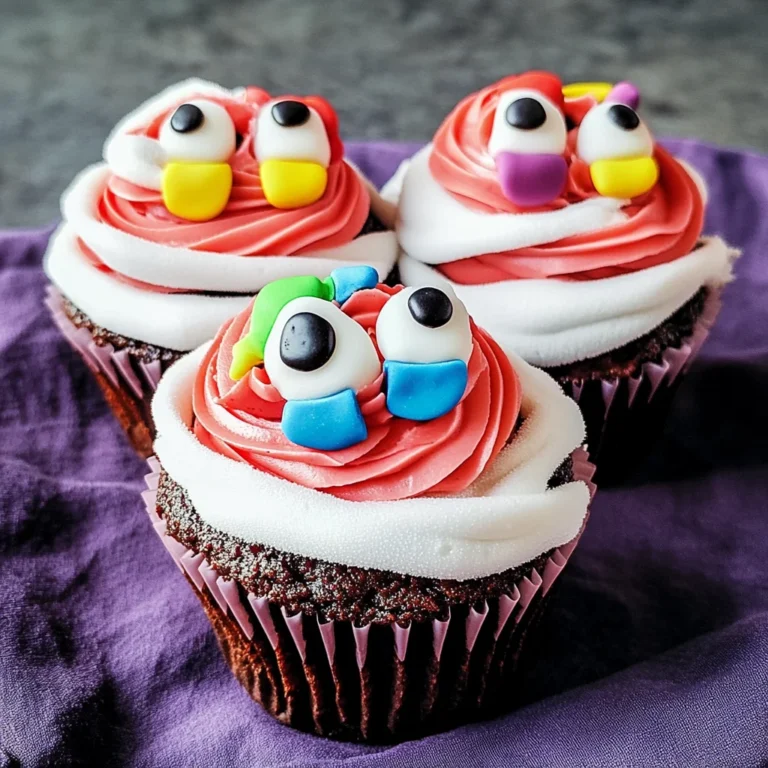
Monster Eye Cookies
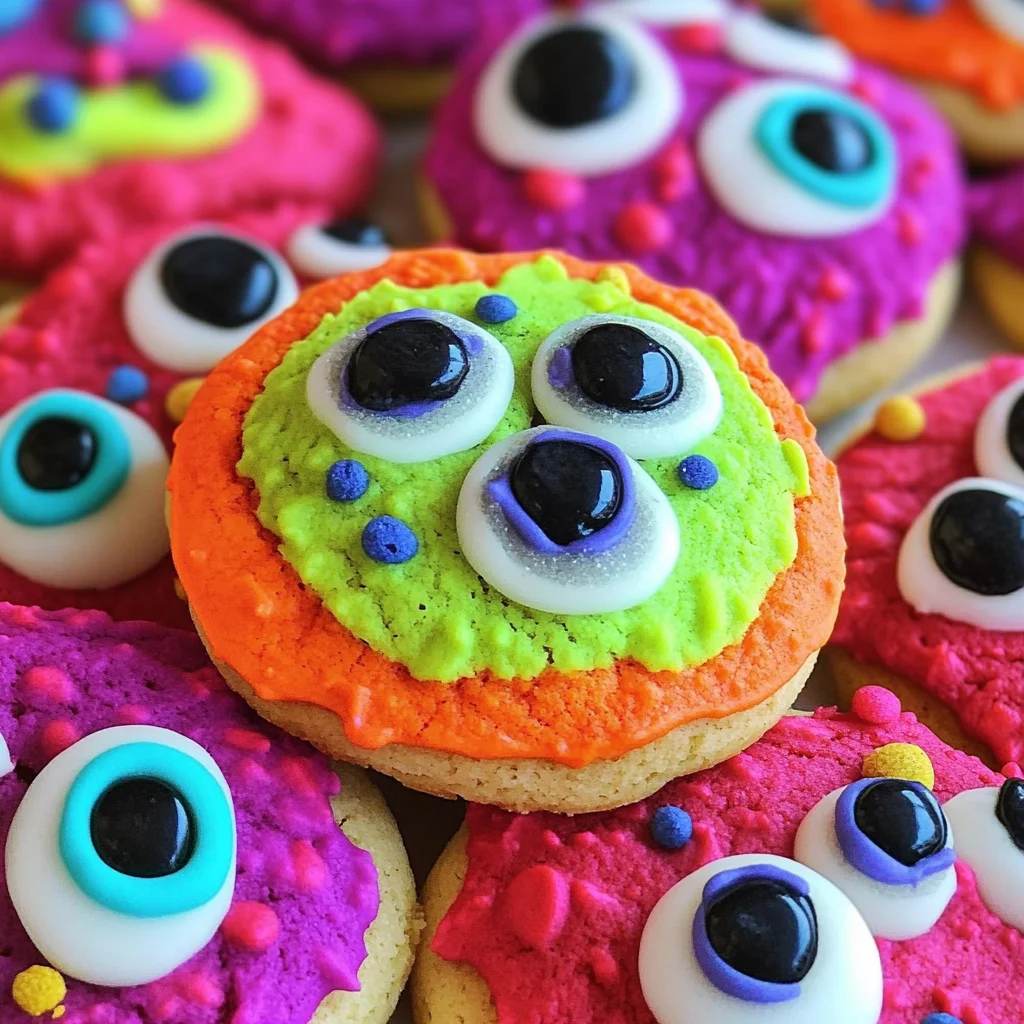
If you’re looking for a fun and festive treat to whip up this Halloween, look no further than these delightful Monster Eye Cookies! They are not only a visual treat with their bright colors and comical googly eyes, but they also taste amazing. This recipe has become a family favorite in our household, and I can’t wait to share it with you!
Perfect for busy weeknights or family gatherings, these cookies bring everyone together. Kids love getting involved in the kitchen, and decorating these cookies is a blast! Plus, they make an adorable addition to any Halloween spread.
Why You’ll Love This Recipe
- Easy to Make: With just a few simple steps, you’ll have delicious cookies ready in no time.
- Colorful Fun: The neon food coloring adds excitement that kids will adore.
- Family-Friendly: Everyone will enjoy helping out, making it a great bonding activity.
- Versatile Treat: Perfect for parties, school events, or just a special Halloween snack at home.
- Deliciously Sweet: The combination of cream cheese and cake mix creates a soft and tasty cookie that’s hard to resist.
Ingredients You’ll Need
Let’s gather our ingredients! These are simple, wholesome items that you probably have in your kitchen already. Grab your apron because we’re about to get baking!
For the Cookies
- 1/2 cup Butter, Softened
- 8 oz Cream Cheese, Softened
- 1 Egg
- 1/2 tsp Vanilla
- 1 box White Cake Mix
- Neon Food Coloring
- Candy Eyes
Variations
One of the best things about Monster Eye Cookies is how flexible this recipe is! You can easily customize them to suit your taste or occasion.
- Mix Up the Colors: Use different shades of food coloring to create unique monster eyes.
- Add Sprinkles: Top the cookies with colorful sprinkles for an extra festive touch.
- Try Different Shapes: Use cookie cutters to create spooky shapes like bats or pumpkins!
- Flavor Twist: Add a teaspoon of almond extract for a nutty flavor that pairs well with the sweetness.
How to Make Monster Eye Cookies
Step 1: Preheat the Oven
First things first, preheat your oven to 350 degrees Fahrenheit. This ensures that our cookies bake evenly and come out perfectly fluffy.
Step 2: Mix the Base
In a large mixing bowl, beat together your softened butter, cream cheese, egg, and vanilla until smooth. This creamy mixture is essential as it gives our cookies that lovely texture and rich flavor. Then, mix in your white cake mix until everything is well combined.
Step 3: Color It Up
Now comes the fun part! Divide your batter into separate bowls according to how many colors you want. Add neon food coloring to each bowl and mix until you achieve vibrant hues. This step not only makes our cookies look cool but also adds an element of creativity!
Step 4: Scoop and Bake
Using a cookie scoop or tablespoon, scoop out 1 1/2 tbsp-sized balls of dough and place them onto your prepared baking sheet. Bake them in the preheated oven for about 10 minutes. The smell will be heavenly!
Step 5: Decorate with Candy Eyes
As soon as you pull those delicious cookies from the oven, it’s time to add the candy eyes! While they’re still warm, gently press the eyes into the center of each cookie. This will give them that fun monster look we all love!
Once baked and decorated, let them cool slightly before enjoying these playful Monster Eye Cookies with your family and friends. Happy Halloween baking!
Pro Tips for Making Monster Eye Cookies
Making Monster Eye Cookies can be a delightful experience, especially when you have a few handy tips up your sleeve!
-
Use room temperature ingredients: Starting with softened butter and cream cheese helps create a smooth batter, ensuring that your cookies come out perfectly fluffy.
-
Experiment with colors: Don’t be afraid to mix different neon colors together! This can lead to some fun and unique cookie designs that your kids will absolutely love.
-
Bake in batches: If you’re making multiple colors, consider baking the cookies in batches. This way, you can keep an eye on each batch without getting overwhelmed.
-
Place candy eyes strategically: When you add the candy eyes, slightly press them into the cookie dough while it’s warm. This helps them stick better, so they don’t fall off later.
-
Let cookies cool completely before storing: Allowing the cookies to cool on the baking sheet for a few minutes before transferring them to a wire rack ensures they maintain their shape and texture.
How to Serve Monster Eye Cookies
These colorful Monster Eye Cookies are not only fun to make but also exciting to present! Here are some creative ways to serve them that will certainly impress your guests.
Garnishes
-
Sprinkles: Add a sprinkle of colorful edible glitter or Halloween-themed sprinkles on top of the cookies for an extra festive touch.
-
Whipped Coconut Cream: A dollop of whipped coconut cream alongside these cookies provides a deliciously creamy contrast that complements their sweetness.
Side Dishes
-
Apple Slices with Caramel Dip: Crisp apple slices paired with a smooth caramel dip create a refreshing side that balances out the sweetness of the cookies.
-
Veggie Platter: Offer a vibrant platter of assorted fresh vegetables like carrots, celery, and bell peppers with hummus for dipping. This adds a healthy crunch alongside your sweet treats.
-
Popcorn: Sweet or savory popcorn makes for an easy and fun side dish. Consider drizzling some melted dairy-free chocolate over popcorn for an indulgent touch that pairs well with the cookies.
-
Fruit Salad: A light fruit salad made with seasonal fruits adds freshness and color to your dessert table, making it visually appealing and deliciously healthy.
With these tips and serving suggestions, you’ll be ready to share your delightful Monster Eye Cookies at any Halloween gathering or festive occasion!

Make Ahead and Storage
These Monster Eye Cookies are perfect for meal prep, allowing you to whip up a batch ahead of time for Halloween parties or family gatherings. Their vibrant colors and fun appearance make them a hit, and with a little planning, you can enjoy them fresh whenever you want!
Storing Leftovers
- Allow cookies to cool completely before storing.
- Place cookies in an airtight container at room temperature.
- Keep them stored for up to 5 days for the best taste and texture.
Freezing
- To freeze cookies, ensure they are completely cooled.
- Layer cookies between sheets of parchment paper in a freezer-safe container.
- Freeze for up to 2 months; simply thaw at room temperature when ready to enjoy.
Reheating
- Preheat your oven to 350 degrees F.
- Place cookies on a baking sheet and warm them for about 5 minutes.
- This will help restore their soft texture without overbaking.
FAQs
If you’re curious about Monster Eye Cookies, here are some common questions that might help!
Can I use different colors for Monster Eye Cookies?
Absolutely! Feel free to experiment with any neon food coloring you like. You can create a variety of colors to make your Monster Eye Cookies even more festive!
How long do Monster Eye Cookies last?
When stored properly in an airtight container at room temperature, these delicious cookies will stay fresh for up to 5 days. If you want them to last longer, consider freezing them.
What can I substitute for cream cheese in Monster Eye Cookies?
You can replace cream cheese with a vegan cream cheese alternative or Greek yogurt for a lower-fat option. Both will still give your cookies that delightful texture without compromising flavor!
Can I add other decorations to my Monster Eye Cookies?
Definitely! Besides candy eyes, you can decorate your cookies with sprinkles or edible glitter to make them even more fun and festive for Halloween.
Final Thoughts
I hope you get as much joy from making these Monster Eye Cookies as I do! They are not only fun to create but also bring smiles to everyone who sees (and eats) them. Perfect for Halloween gatherings or just a fun baking day with the kids, this recipe is sure to become a favorite in your household. Enjoy every moment of this delightful baking adventure, and don’t hesitate to share your spooky creations with friends and family!
Monster Eye Cookies

Get ready to add a colorful twist to your Halloween festivities with these delightful Monster Eye Cookies! Bursting with vibrant colors and topped with comical candy eyes, these cookies are not only visually appealing but also irresistibly delicious. Perfect for family gatherings or Halloween parties, they invite creativity and fun in the kitchen, making them an enjoyable baking project for kids and adults alike. With an easy-to-follow recipe, you’ll have a batch of these spooky treats ready in no time. So gather your ingredients and let’s create some monster magic!
- Prep Time: 15 minutes
- Cook Time: 10 minutes
- Total Time: 25 minutes
- Yield: Approximately 24 cookies 1x
- Category: Dessert
- Method: Baking
- Cuisine: American
Ingredients
- 1/2 cup softened butter
- 8 oz softened cream cheese
- 1 egg
- 1/2 tsp vanilla extract
- 1 box white cake mix
- Neon food coloring
- Candy eyes
Instructions
- Preheat your oven to 350°F (175°C).
- In a large mixing bowl, beat together the softened butter, cream cheese, egg, and vanilla until smooth. Gradually mix in the white cake mix until fully combined.
- Divide the batter into bowls and add neon food coloring to each for vibrant shades.
- Scoop out 1 1/2 tbsp-sized balls of dough onto a prepared baking sheet and bake for about 10 minutes.
- Immediately press candy eyes into the center of each cookie while they're still warm.
Nutrition
- Serving Size: 1 serving
- Calories: 120
- Sugar: 10g
- Sodium: 75mg
- Fat: 6g
- Saturated Fat: 3g
- Unsaturated Fat: 2g
- Trans Fat: 0g
- Carbohydrates: 15g
- Fiber: <1g
- Protein: 1g
- Cholesterol: 20mg